 Custer
 Building on Sandy Point Means Building for the Weather Off the Strait
Sandy Point sits close enough to the water that the weather off the Strait of Georgia is part of daily life, not an occasional event. Homes going up here take on salt-laden air, wind-driven rain that comes in sideways more often than straight down, and long stretches of gray, damp months where anything porous or poorly sealed starts growing moss or algae. New-construction windows are one of the few building components that have to perform against all three of those conditions at once, every day, for decades. Get the window right and get the installation right, and a home stays dry and comfortable. Get either one wrong, and the problems usually don't show up until they're already inside a wall.
This page is about one job done in one place: installing new-construction windows in homes being built in and around Sandy Point, in Whatcom County. We're not talking about swapping old windows in an existing house — that's a different scope with different rules. New construction is your one real chance to get the water management right from the framing stage forward, before drywall and siding cover up the details that matter most.
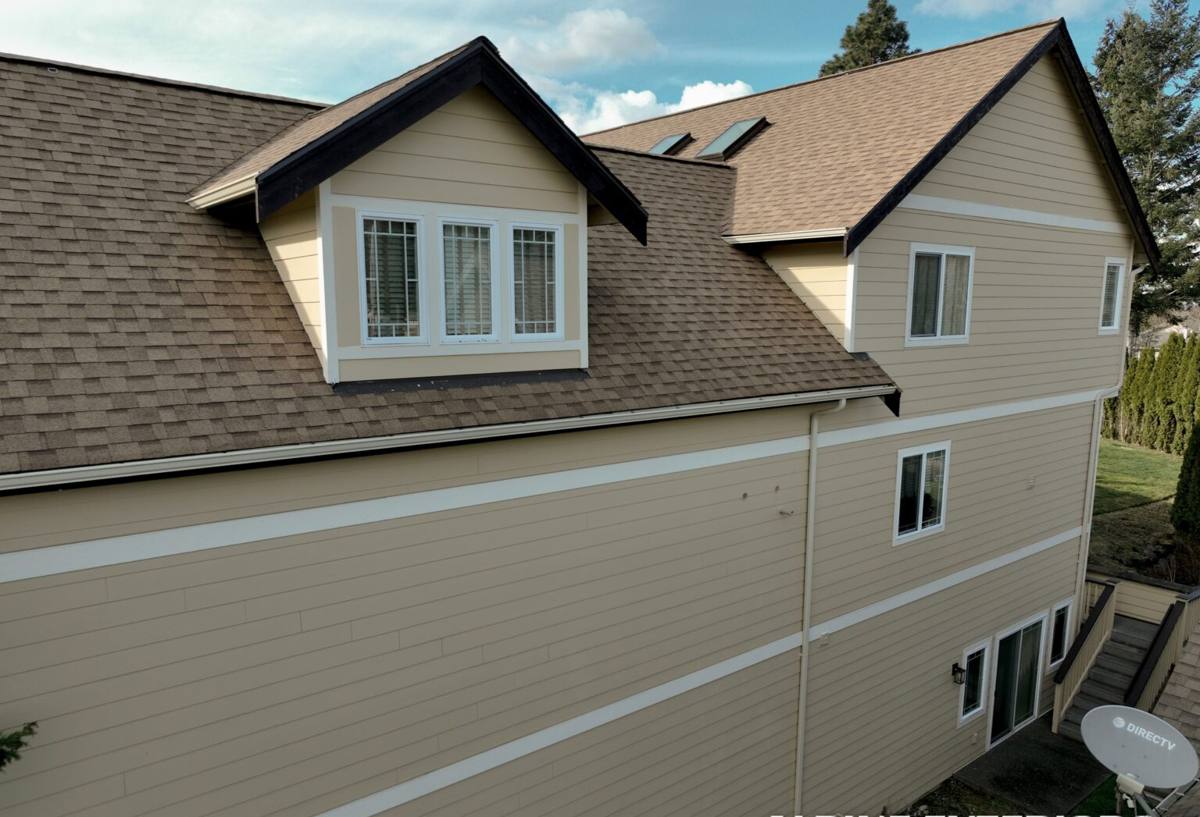
New-Construction Windows Aren't the Same Job as Replacements
A lot of homeowners assume "installing a window" is one skill. It isn't, not really. Replacement windows go into an existing rough opening with existing siding and trim around it — the installer works with what's there. New-construction windows go in during framing, before the weather-resistive barrier (WRB), siding, and trim are on the house. That means the window installer is setting the foundation for how water will be managed at every opening for the life of the house.
The practical difference: new-construction windows typically have a nailing fin (or "nail fin") around the perimeter of the frame that gets fastened directly to the sheathing, then integrated into the WRB and flashing system in a specific order. Do that sequence correctly and water sheds down and out, the way shingles on a roof do. Do it out of order, or skip a step because "it's probably fine," and you've built a path for water to get behind the siding — one that won't announce itself until there's a stain on drywall or soft framing a few years down the road.
Why This Matters More in Sandy Point Specifically
- Wind-driven rain off the water pushes moisture at window openings harder and from more angles than typical inland exposure.
- Salt air accelerates corrosion on unprotected fasteners, hinges, and low-grade hardware.
- Extended damp seasons keep sealants and gaskets under near-constant moisture load, so material quality and correct compression matter more.
- Shaded, tree-lined lots (common around Sandy Point) hold moisture longer after storms, which is part of what feeds moss and algae growth on trim and siding.
Choosing a Frame Material for Salt Air and Driving Rain
There's no single "best" window material for every house — it depends on budget, exposure, and how the home is finished. But in a salt-air, high-rain environment like Sandy Point, some trade-offs matter more than they would somewhere drier and further inland. Here's how the common frame options generally compare for this specific setting:
| Frame Material | Salt Air / Corrosion Resistance | Moisture Behavior | Maintenance |
|---|---|---|---|
| Vinyl | Very good — won't corrode; hardware quality varies by manufacturer | Doesn't absorb or rot; relies on correct sealing at joints | Low — occasional cleaning |
| Fiberglass | Excellent — stable in temperature swings and salt exposure | Very low expansion/contraction, holds seals well over time | Low |
| Aluminum-clad wood | Good on the exterior face; wood core needs the cladding to stay intact | Wood core can be vulnerable if the seal ever fails | Moderate — watch cladding seams |
| Bare aluminum | Weakest in salt air without a quality finish; prone to pitting over time | Conducts cold, more condensation risk in our climate | Higher — finish maintenance |
We don't push one brand or one material on every project. What we do insist on, regardless of what a homeowner or builder chooses, is corrosion-resistant fasteners and hardware — stainless steel or coated screws at the nailing fin, not standard-grade hardware that looks fine on delivery day and starts staining or seizing within a couple of damp winters. That's a small line-item cost that has an outsized effect on how a window performs near the water.
Flashing and Water Management: The Part That Actually Prevents Leaks
Most window failures aren't glass failures or frame failures — they're flashing failures. The glass and frame can be excellent and the house can still leak if the water management around the opening isn't sequenced correctly. This is the least visible part of the job and the part we spend the most time getting right.
What correct sequencing looks like
- Sill pan flashing installed first, sloped to drain outward, so any water that gets past the window has somewhere to go besides the framing.
- WRB (house wrap) lapped correctly at the sides and head of the opening before the window goes in.
- Window set into the opening, shimmed level and square, fastened at the nailing fin per the manufacturer's schedule — not just "a screw every foot or so."
- Side flashing tape applied over the fins, then head flashing last, always shingle-lapped so upper layers overlap lower ones — never the reverse.
- Sealant used only where the manufacturer calls for it, with the right compatible product — some sealants degrade certain WRB or flashing tapes over time instead of bonding with them.
- Interior air-sealing and insulation at the rough opening perimeter, which affects both energy performance and condensation risk in our cooler months.
Skip the sill pan, flash out of order, or caulk everything shut without a drainage path, and you trap water instead of shedding it. In a climate that gets driving rain on a regular basis, that's not a small oversight — it's the difference between a window that lasts the life of the house and one that causes a repair inside five to ten years.
How Our New-Construction Process Works
For Sandy Point builds, our process generally looks like this:
- Plan review and window schedule. We look at the build plans, rough opening sizes, and window schedule with the builder or homeowner before anything is ordered, so sizes and swing/slide directions are right the first time.
- Material selection consult. We walk through frame material and glazing options against the home's exposure, orientation, and budget — with straight talk about trade-offs, not upselling.
- Coordination with the framing schedule. Windows go in at the right point in the build sequence — after sheathing and WRB are ready for them, before siding closes everything up.
- Install per manufacturer instructions. Every window brand has its own fastening and flashing instructions; following them (not a generic "how we've always done it") is what keeps warranties valid.
- Flashing and sealant sequencing as outlined above, checked at each opening — not spot-checked at a few and assumed fine at the rest.
- Final walkthrough checking operation, seals, and visible flashing before the crew moves off the job.
Timing With Your Builder Matters
One of the more common problems on new builds isn't bad workmanship — it's bad timing. Windows ordered too early or too late relative to the framing schedule cause delays, or worse, get installed under pressure to "keep the schedule moving" before the opening or WRB is actually ready. We coordinate directly with general contractors and framers on Sandy Point projects so window install happens at the right point in the sequence, not squeezed in around it. If you're the homeowner working with your own GC, we're glad to talk directly with your builder to lock in that timing early.
Mistakes We See on Coastal Whatcom County Builds
- Standard-grade fasteners used at the nailing fin instead of corrosion-resistant hardware, leading to staining and eventual hardware failure.
- Flashing tape applied out of shingle-lap order, or head flashing skipped entirely under the assumption that "the siding will cover it."
- Sealant used as the primary water barrier instead of proper flashing — caulk is a backup layer, not a substitute for correct sequencing.
- No sill pan flashing, leaving no drainage path if water ever does get past the sill.
- Window trim details that don't account for moss and algae growth in shaded, damp areas — tight-to-siding trim with no drainage gap holds moisture longer than it should.
None of these are exotic problems. They're common, avoidable, and mostly invisible until years later. That's exactly why the install matters as much as the window itself.
Why a Local Crew Matters for a Sandy Point Build
We're not driving in from out of the area to figure out Sandy Point's exposure on your project. A crew that already works homes in and around Custer and Whatcom County has a working sense of how differently the weather behaves close to the water versus a few miles inland — how much harder wind-driven rain hits certain elevations and orientations, how long shaded siding stays damp, and which details are worth the extra half-hour per opening because the climate doesn't forgive shortcuts. That's not a marketing line — it's the difference between a crew learning your site's exposure on your dime and one that already knows what this stretch of coastline does to a house.
We're also on hand locally if a question comes up after the walls are closed in — during finish work, at final inspection, or after move-in during that first real storm season. You're not calling a number that connects to a call center three states away.
What to Check Before New-Construction Windows Go In
- Rough openings sized and squared to the window schedule, not "close enough."
- WRB installed and ready to integrate with window flashing before windows arrive on site.
- Frame material and glazing selected with this site's sun exposure and wind direction in mind, not just a builder default.
- Fastener and hardware spec confirmed as corrosion-resistant for coastal exposure.
- Flashing plan agreed on paper before the crew opens the first box — sill pan, side flashing, head flashing, in that order.
- A clear point of contact between window installer and builder so scheduling doesn't force rushed work.
After Move-In: Keeping Coastal Windows Performing
Correctly installed new-construction windows in this climate need very little — that's the point of doing the install right. What we recommend: rinse salt residue and grime off exterior frames a couple of times a year, keep an eye on weep holes at the sill so they don't get blocked by debris or moss buildup, and check that exterior caulk lines stay intact rather than assuming a "lifetime sealant" claim means zero maintenance. None of that is heavy work, but skipping it in a salt-air environment lets small issues turn into bigger ones faster than they would inland.
If you're planning a new build or already framing a home in Sandy Point and want windows installed by a crew that treats water management as the actual job, not an afterthought, we'd be glad to take a look at your plans. Reach out for a free, no-pressure estimate using the form below.