 Custer
 Window Installation Built for Cherry Point's Water-Facing Exposure
Cherry Point sits right on the Salish Sea north of Custer, and that shoreline setting changes what a window installation needs to survive out here compared to a home a few miles inland. Properties in this stretch of Whatcom County take direct salt-laden air off the water, driving rain that comes in sideways with almost nothing to break the wind, and a moss and mildew season that runs long into most of the calendar year on shaded or north-facing walls. A window installation is where all of that pressure concentrates, because every window opening is a cut in the building envelope — a seam that has to be sealed, flashed, and drained correctly or it becomes the point where water gets into the wall.
We install windows as part of the siding, roofing, and exterior work we do throughout this part of Whatcom County, and on a near-water property like Cherry Point we don't treat window installation as separate from the rest of the building envelope. The window unit itself matters, but the installation detail around it — how it's flashed, how it drains, and how it ties into the surrounding siding — is what actually determines whether it holds up.
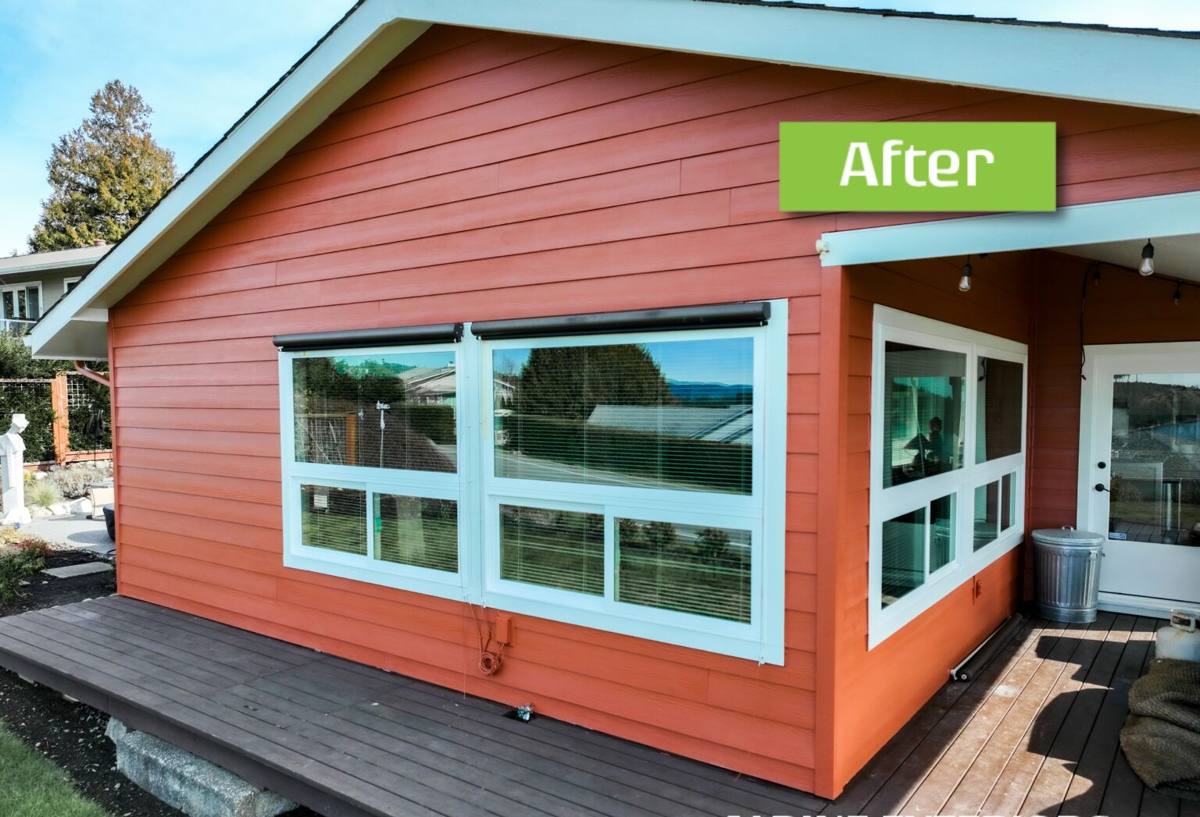
What Cherry Point's Environment Demands From a Window Installation
Salt Air and Corrosion
Direct shoreline exposure means Cherry Point homes deal with more sustained salt-laden air than properties set back from the water, and that air accelerates corrosion on lower-grade window hardware, fasteners, and frame components. Hinges, locks, and cranks that would last for decades in a drier inland climate can start pitting, sticking, or failing years earlier this close to the water. Fastener choice and hardware grade matter more here than they do on a typical inland job.
Wind-Driven Rain
Open water frontage gives storms nothing to slow down before they hit the wall of a Cherry Point home. Rain doesn't just fall here, it drives sideways into window openings under real wind pressure, which means flashing has to actively shed water outward rather than simply covering a gap. A flashing detail that would be adequate in a sheltered, tree-lined lot can fail on a site with open exposure to the water.
A Long Moss and Mildew Season
Mild, damp conditions across fall, winter, and spring give moss and mildew a long window to establish themselves on window sills, trim, and any surface where water sits instead of draining away. Shaded elevations and window openings with poor drainage detailing show growth first, and once moss or mildew takes hold on wood trim it traps moisture against the surface and accelerates rot underneath.
Condensation From Interior-Exterior Temperature Swings
The gap between a heated interior and a cold, saturated exterior wall creates real condensation pressure on window glass and frames through the wet months. A well-installed, properly glazed window manages that pressure; a poorly sealed or older window shows it constantly as fogging, sill moisture, or drafts that never fully go away no matter how the thermostat is set.
What a Correct Window Installation Actually Involves
A window installation is judged by what you can't see once the trim goes back on. The unit itself is a small part of the job — the sequence of steps around it is what determines whether that window stays dry for thirty years or starts leaking within a few wet seasons.
- Rough opening preparation: The opening is checked for square, level, and proper size before anything goes in, and any existing water damage or rot in the framing is addressed first rather than sealed over.
- Sill pan flashing: A sloped, sealed pan at the bottom of the opening gives any water that does get past the window a path back out, instead of a place to pool against bare framing.
- Weather-resistive barrier integration: Flashing tape and the window's flanges are lapped correctly with the existing house wrap or building paper, following a shingle-style sequence so water is always directed down and out, never trapped behind a layer above it.
- Setting and shimming the unit: The window is set plumb, level, and square, then shimmed at the correct load points so it operates smoothly and doesn't bind or sag over time.
- Insulating the gap: The space between the window frame and rough opening is filled with a low-expansion foam or backer rod and sealant designed for that gap, not packed with material that can bow the frame or left open as a draft and moisture path.
- Exterior trim and siding tie-in: Trim, flashing, and the surrounding siding are integrated so water shedding off the wall above the window is directed around the opening, not into it.
Skip or shortcut any one of those steps and the window itself barely matters — water will find the gap. This sequence is standard on every window we install, not an upgrade a homeowner has to specifically request.
Choosing Window Materials for Direct Water Exposure
Material choice matters more on a shoreline property than it does a few miles inland, since the frame, glazing, and hardware all face more sustained exposure to salt air and moisture. We talk homeowners through real trade-offs rather than steering toward one brand as the only right answer.
| Frame Material | Performance Near the Water | Maintenance |
|---|---|---|
| Vinyl | Resists rot and corrosion well; performs reliably in wet, mild climates | Low — no painting or sealing required |
| Fiberglass | Dimensionally stable across temperature swings; strong option for direct exposure | Low; can be painted if a custom color is wanted |
| Wood, uncladded | Most vulnerable to rot and moisture damage in this environment | High — regular refinishing and moisture monitoring needed |
| Aluminum-clad wood | Cladding protects the exterior face, but cut edges and joints need careful detailing | Moderate — interior wood still needs monitoring |
For hardware, we specify corrosion-resistant fasteners and components rated for coastal or marine exposure rather than standard-grade hardware, since the difference in service life this close to the water is significant. On glazing, a double or triple-pane unit with a low-E coating helps on two fronts at once — reducing heat loss during cold, wet stretches and cutting down on the interior condensation that shows up on window glass during winter.
Full-Frame Replacement vs. New Construction Installation
Not every window installation is the same job. The right approach depends on whether the opening already exists and what condition the surrounding framing is in.
| Situation | Typical Approach | What It Involves |
|---|---|---|
| Existing opening, sound framing | Full-frame replacement | Old window and flashing removed down to the framing; new sill pan, flashing, and window installed fresh |
| Existing opening, damaged framing or sill | Full-frame replacement with framing repair | Rotted or compromised framing is repaired or replaced before the new window and flashing go in |
| New construction or a new opening | New construction installation | Window is set and flashed as the wall assembly is being built, integrating with house wrap and siding from the start |
| Sound existing frame, unit only needs updating | Insert (pocket) replacement | New window fits inside the existing frame; faster, but doesn't address flashing or framing issues underneath |
An insert replacement can be a reasonable option when the existing frame and flashing are genuinely sound, but on a Cherry Point property we check that assumption carefully first. Covering a marginal flashing detail with a new window instead of correcting it just delays a problem that direct water exposure will eventually expose.
Our Window Installation Process
- On-site assessment: We look at each opening, checking existing framing condition, current flashing, and how exposed the specific wall is to wind and water.
- Honest recommendation: We tell you plainly whether a full-frame installation, framing repair, or insert replacement is the right call for each window — not a blanket answer applied to every opening.
- Written scope: Before work begins, you get a clear scope that separates the manufacturer's product warranty from our installation warranty, so it's clear what's covered and by whom.
- Removal and prep: Old units are removed, the opening is checked and repaired if needed, and framing is confirmed square and sound before anything new goes in.
- Flashing and installation: Sill pan, flashing tape, and the window itself are installed in the correct sequence, integrated with the existing weather-resistive barrier and siding.
- Trim and final seal: Interior and exterior trim go back on, gaps are properly insulated and sealed, and the finished opening is checked for operation and sealing before we call the job done.
A Checklist Before Hiring for Window Installation Near the Water
- Ask specifically how they handle sill pan flashing and weather-resistive barrier integration, not just which window brand they carry
- Confirm current Washington contractor licensing and active liability insurance
- Get a written scope that separates the window's product warranty from the contractor's installation warranty
- Ask whether they recommend full-frame replacement or an insert for each specific opening, and why
- Ask what hardware and fastener grade they use given the direct water exposure this location gets
- Confirm lead times, since window orders for this region can run several weeks depending on size and configuration
Why a Crew That Already Works Cherry Point Matters
Direct shoreline exposure isn't the same challenge as a typical inland Whatcom County job, and a contractor who hasn't worked properties this close to the water can underestimate what the flashing and hardware need to hold up against. The decisions that actually determine long-term performance — how much lap a flashing detail gets, whether sealant is treated as a supplement to flashing or a substitute for it, what hardware grade gets specified — come from having done this work on similarly exposed properties before, not from a general installation checklist. We work this stretch of coastline regularly enough to know which corners can't be cut here even if they'd be fine somewhere more sheltered.
Get an Honest Look at Your Windows
Whether you're planning new construction, replacing aging windows that are finally losing the battle with salt air and driving rain, or just not sure whether your current windows are holding up the way they should, we're happy to take a look and give you a straightforward assessment. Reach out below for a free, no-pressure estimate.